Friday, May 16, 2008

Resonance instability = fun


I was fiddling with the polivoks vcf's resonance this evening and came about a startling setting. Something I can only describe as a sustaining vinyl needle slip.

The only modules in this set up (as shown to the right) are a Livewire Dual Cyclotron -> PlanB Model-15. the Model-15 pulse out -> Polivoks vcf -> Model-13 set fully open (vca-only setting).

The polivoks settings are static, no modulation inserted into the unit of any kind. The input attenuation is at about 60%. Luckily (or not, depending on your opinion) I'd been recording the patch. I brought the cutoff down slowly, once the "needle scratch" is sustained I touched nothing else. The circuit eventually stopped and restarted the oscillation on its own.

It doesn't sound pretty, thats for sure. but we likes it.


Friday, May 9, 2008

FLAME Clockwork: review pt. 2


Alright, I've had a few days worth of tinkering and fondling with the unit and I've gathered some more opinions and a few questions along the way.

You Don't Know Jack: Lets start with those lovely 3.5mm outputs. I have to award a gold star or two on quality. These have to be the most snug 1/8 sockets I've personally ever used. It actually takes a fair amount of force to get them out, I've even taken some pictures of this feat with and without a flash, there's no photoshopery (photoshop + tom foolery = photoshopery. its in the bible, look it up) going on here. I've had my fair share of modules (atleast in eurorack format) and one thing that always rings true whomever the manufacture is; over time you will have to do a little maintenance. Taking an hour (or 4, depending on your system) and one by one gently pressing each sockets contact plates inward slightly as they will loosen over time to give you those nifty, troublesome connections we all know and love.

MIDI will convert you: Throwing in a midi converter along with the package was a nice touch. I mean, they already had to write the code to have the unit sync to midi clock, why not go the extra mile an do use all a solid and add the converter? To be honest I would have probably still bought the thing had a converter been absent from the equation. I used the clockwork with just the MIDI at first, testing it as a control surface then as a sketchpad rhythm box. Both were easy to initiate and the unit responded well to fast as well as slow movements. I didn't notice any zippering or sluggish behaviors, yet another handy use to add to the collection! But this coin has two sides and as such while putting this little guy through his paces I came across two worrisome glitches that I hope are particular to my unit and not your own. (NOTE: I used all eight midi outs on my Emagic AMT8 as well as the thru's on my Doepfer A-190 and Future Retro Mobius. ALL connection paths achieved the same results) The first of two oddities was the CV output, Its pitch slightly fluctuated as if someone had left the mod wheel on a quarter of the way up. I also tried the exact same cables on the other two converters with no problems. Secondly the unit seems to have a begrudging disdain for keys E4 & F4. If this pair is pressed simultaneously you get a nice, sustained, warm & fuzzy feeling in your gut along with stuck CV and Gate settings. Thats a great feature. Here, let me show you.


Bits & Bobs: Again, I'm hoping its just my unit. Even so, I'm still in love with the Clockwork. I'm going to have to stash it elsewhere for a bit because its starting to be a crutch and just too damn fun to not mess with. Lastly, I'm not sure if this is a feature to this unit (or just something common all together with gear) but if you accidentally plug the midi cable that is supposed to be going to the "in" of your unit into the "out" it politely lights up all of its LEDs to half brightness regardless if it has power or not. Which I like to imagine, it its own special way is trying to tell you "...wrong hole fool !..."

So There you have It. Thats my honest, unfiltered, unbiased opinion. I hope I've been informative enough for you to come away with at least one thing new to learn about the unit. :)

Thursday, May 8, 2008

Slacking on the other half.


I've been busy this week and haven't had time to write the second half of the review for the Clockwork, but I will get to it, soon.

In its stead I have uploaded a short mp3 of a very bland patch that shows how the 3 seperate gate/clock outputs could be used to fire off individual envelopes in a patch. the summed CV/LFO is routed to the 1v/oct input of a Plan B Model-15. the rest of the patch can be seen here. Nothing fancy, just random division assignments that the Clockwork puts into play every downbeat.


I amost forgot, I wouldn't have the opportunity to make this review had Shawn @ Analogue Haven not told me about it. I'd recommend anyone interested in something like this to shoot either Shawn or Andrew over there an email. Good guys those two.

Tuesday, May 6, 2008

FLAME Clockwork: review pt.1


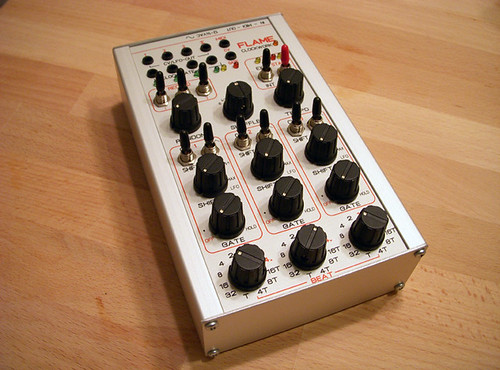
Well its been almost 24 hours since I unboxed the unit and have spent a fair amount of time using it today. I'll restate again for the sake of continuity that it was easy to grasp the units functionality without referring to the provided (see: scant) information. But I really can't blame them for that, there isn't that much to the thing honestly.

First and foremost let me get out of the way the few critical points I have on the unit, all cosmetic mind you. 1) I give you Exibit A: The bottom 3 potentiometers are different than the rest as they are 12-position switches as opposed the the full turn pots that lay throughout the rest of the unit. They also reside on a separate PCB below the PCB populated by the rest of the aforementioned pots. The posts were longer originally so they were shorted, which I can understand the reason why (who wants longer knobs hanging around short knobs? anyone, anyone? *crickets*) But the way in which they were shortened is strange to me. as shown in Exibit A they look as if they were gnawed off by rodents. I know this is a cosmetic particular and probably wholly without merit, but it was something i thought needed pointing out. 2) I did not take pictures of the power supply but the unit i received came using 230v european power with a rather fitting european power plug. Now the astute germans were kind enough to send along a power 
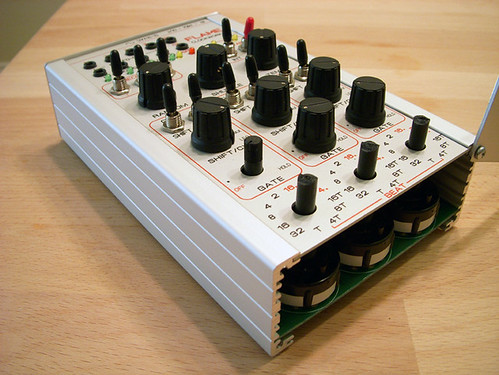
stepper than allows us here in the states to run the lovely thing, but man, could you have used a bigger step up converter? I now know what to bludgeon any would-be intruders with if the occasion ever arose. 

OK, now on to the good stuff. 

I'm not a musician, I'm a drummer (ha, beat you all to it), and as such I tend to instinctually think in measurements of time rather than notes, chords, scales, what-have-you. A lot of my modular programming is based on creating intricate time driven triggers that fire off in interesting patterns to make up what eventually spills out of the VCAs and into Logic. This piece of gear has made that endeavor much more playable (and in sync to boot!) letting me quickly try out different rhythmic mixtures and variations without a lot of re-setting and re-patching. Everyone will use a particular module or unit in their own way eventually, I'm not saying my way is the best, I'm only going to tell you how I've started using it myself and take from it what you will.

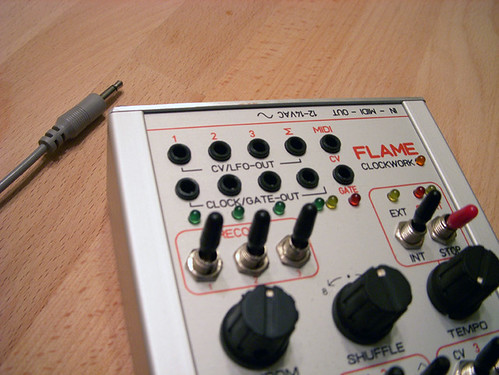
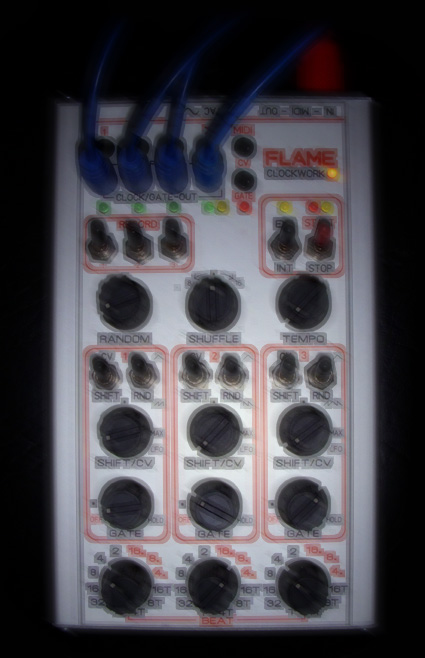
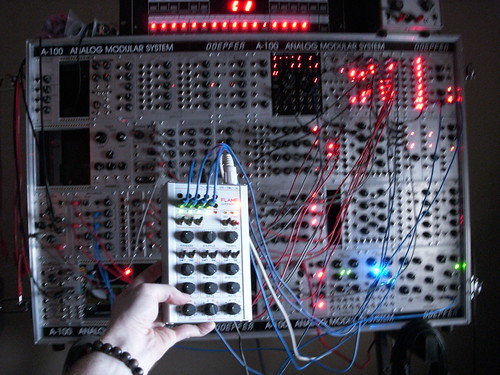
BEAT: The three independent hearts of the unit. They can uniformly pulse together as one just as easily as they can dance around one another, its really all up to you. I find it very useful how the Clockwork only changes the time division on the next measure. Allowing for more common place transitions as well as helping you know where the 1 is if your not looking at the unit. (Coincidentally, the unit has two clock LEDs above the "start/stop" switch a yellow LED that flashes every quarter beat and a red LED that flashes on the down beat) Although it would be nice to have a switch or multi position knob that lets your set when the change happens (whole measure, quarter note, etc. as you can in LIVE with loops for instance. next time perhaps?)

GATE: More or less a length knob that determines the length of the impulse each track generates. When fully to the left you get nothing, nada, ziltch. At the "dot" you start to get a trigger, from then until just before the "hold" notation the further you turn the knob to the right the longer the gate is held within the time frame of the clock division. Finally, at hold its basically self explanatory.

SHIFT/CV: This is a dual function knob, dependent upon the position of the above-left switch for each shift/cv knob. In CV mode the knob is used as an attenuation for the voltage of a trigger signal up until you get past the MAX notation, once the knob reaches the LFO notation the cv outputs an LFO (duh, get on the with it) who's cycle time is synced to the set subdivision of the BEAT knob. In SHIFT mode the knob is null and void at the halfway point, any variance to the left or right shifts the timing of the gate up to half a step ahead or behind the currently selected BEAT.

Thats all I have on the FLAME Clockwork for now. I'll be stitching together a (hopefully) decent video showing its features later on in the week. For now you can view the rest of the images I took while opening it up here.

I'd recommend this unit to anyone seeking a more hands on & immediate control source for timing in your modular system, SO MUCH FUN!


Monday, May 5, 2008

FLAME Clockwork... the first 10 minutes.


ok, so I just de-boxed this guy around 3:00am and have only spent about 15 minutes with it. not nearly long enough for a justified opinion on the whole. BUT, I will say a few things. 1) I plan on a more in-depth post after I get better acquainted with the bugger. 2) It was easy to understand right out of the box without much mucking about with what little manual (more like a one page pamphlet) that comes with the unit. & 3) I'll open her up and see what kind of build quality we are dealing with.

so, until then here is a short little sample of what the patch above sounds like.